
A Photographer's Guide to Karijini National Park

I have been visiting Karijini National Park for photography since 2017, and have since held many multi-day photography tours here. It is an incredible landscape that I will never tire of visiting and photographing. Many other visitors feel the same about the park and this is why it is a must see for photographers! This guide is based off of my experiences over the past few years.
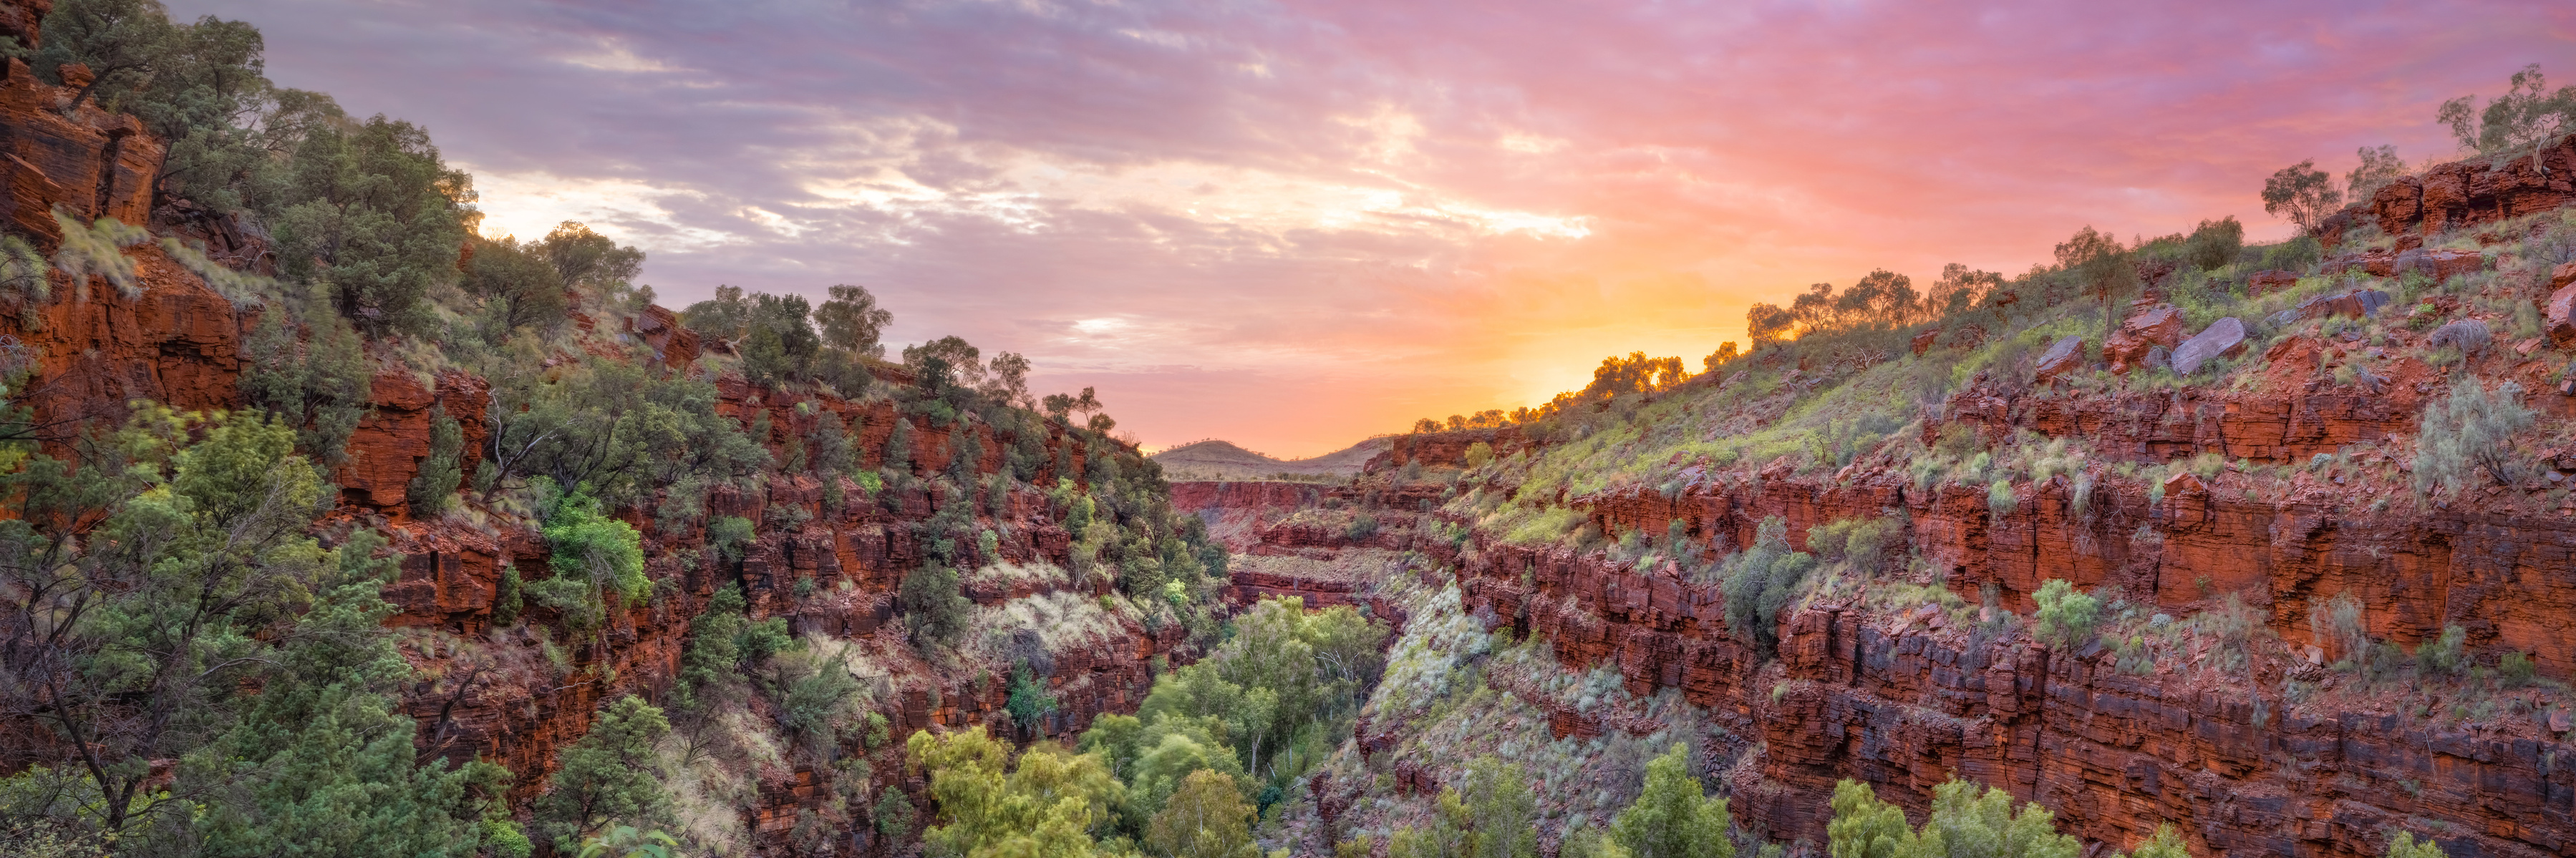
Located in the heart of the rugged Pilbara region of Western Australia, Karijini National Park is a unique bucket list travel destination and, no doubt one of the most beautiful national parks in Australia. Karijini is Western Australia's second largest National Park, and it is nestled amongst Hamersley Range. The park boasts a number of scenic attractions including tranquil gorges, waterfalls, natural swimming holes, and mountains. As well as the beautiful gorges and freshwater streams, the spinifex covered hill sides and clear, dark, night sky make for some great photographic opportunities.
In this guide to Karijini National Park I share all you need to know about visiting Karijini, there is some useful information for photographers, and a suggested 4 day itinerary to make the most of your travels.
Karijini National Park under threat!
If you wish to visit, or have visited Karijini National Park, please consider taking 5 minutes to help save Karijini!
Exquinox Resources intends to initiate drilling for a new iron ore project at the foot of the Hamersley Range, just 3 kilometres from Hamersley Gorge in Karijini National Park.
The proposed mine site lies in an area that is vital for groundwater and surface runoff feeding Hamersley Gorge, one of Karijini's most spectacular and unique attractions.
The waterway in Hamersley Gorge is spring-fed. If this goes ahead, there is a high risk of the gorge drying up. All of the diverse wildlife reliant on Hamersley Gorge will disappear.

How to get to Karijini National Park
The closest town to Karijini is Tom Price, and it is about an 80 kilometre drive from the centre of the park into town. It is recommended you gather all of your supplies (fuel, food, water, etc) necessary for your stay before entering the park to avoid driving back and forth.
The drive from Perth to Karijini takes about 14.5 hours along the Great Northern Highway. I recommend taking your time and stopping over in Mount Magnet or Cue for a night if driving. There is also an option to fly into either Newman or Paraburdoo and pick up a hire vehicle to travel into Karijini. The drive is a little over 2hrs from Newman to the closest park entry, or just over 1hr from Paraburdoo to the nearest park entry.
Is a 4x4 needed in Karijini National Park?
You can get all the way to the entry of Karijini National Park on sealed roads with no need for a 4WD vehicle, but within the park itself some roads are unsealed. However, you still do not need a 4x4 to get around in Karijini National Park as long as you drive to the conditions. The gravel roads are often rough and full of corrugations, but clearance isn't usually an issue and a 2WD vehicle should get by just fine as long as you take it easy.
Another thing to note is that punctured tyres are frequent in Karijini, and whilst I've never had an issue personally, a spare tyre is a MUST, two spares is recommended.
Avoid the unsealed road between Eco Resort and the Visitor Centre unless you are visiting Kalamina Gorge, this road is not maintained often, and is usually in poor condition. Even though the distance is further, it is faster and better for your vehicle to go back out onto the sealed road and around instead. On just one trip into Kalamina Gorge the corrugations where so bad that I lost one of my spotlights, and cracked an exhaust bracket.
When should I visit Karijini National Park?
The best time to visit Karijini is between April-October as the temperatures are pleasant and sky is often clear. Unlike the Southwest of WA, the Pilbara has two distinct seasons. Wet season (November - April) and Dry season (April - October). During the wet season temperatures frequently exceed 40° Celsius, the humidity is high and spectacular thunderstorms form frequently. Heavy rainfall and flash flooding can lead to road and park closures, and if there is a storm approaching, the park rangers will often close access to the gorges for safety purposes.
My recommendation of when to visit Karijini for photographers is to go at the end of the wet season (April/May) as many of the streams and waterfalls throughout the gorges will be flowing well, if you go too later in the season, or if there has been a poor wet season, it is possible that some of the streams will slow to a trickle or even dry up. Take note that late wet season rainfall is still possible at this time so stay up to date on conditions and closures with the Tom Price Visitor Centre, Parks Alert System, and Main Roads Travel Map.


What accommodation is available at Karijini?
There are two campsites within Karijini National Park, both of which are in close proximity to gorges and waterholes.
- Option #1 is the Dales Gorge Campground.
This is a large campground that accommodates campers in several loops, each with picnic tables and drop toilets. There are no powered sites, however there are generators are permitted in some loops. There is NO drinking water available here, visitors must come prepared. Booking must be done online, in advance via DBCA's Park Stay WA Website.
- Option #2 is to stay at Karijini Eco Retreat.
At the Eco Retreat, you can glamp in luxury with one of the Eco Tents which have their own ensuite bathrooms with running water and flushing toilets (a rarity when you're this remote in the outback). You can also opt to stay in one of their unpowered campsites and have access to the communal toilet/shower blocks. The Karijini Eco Retreat also has it's very own Karijini Outback Restaurant, which is great way to fuel up after a day of adventure.
Another place to consider for accommodation is Tom Price. The local caravan park has camp sites and cabins available to book. The closest gorge to Tom Price is Hamersley Gorge, a 70km drive from town.
How to Photograph Karijini National Park
- One of the biggest challenges in photographing Karijini is the harsh difference in light between the shaded gorges and bright sky. A camera will often struggle to capture the full dynamic range in a scene such as this but there is a solution, and that is called bracketing.
Bracketing is a technique where you take multiple exposures at different shutter speeds, and capture the full dynamic range of a scene across a sequence of photographs. You will have generally have a bright exposure (exposed to show detail in the darker areas of the image) a middle exposure (to help with the blending, sometimes you'll end up having multiple of these) and a dark exposure (exposed so that the sky, or brighter areas of the image aren't blown out).
You will then use Photoshop or another post processing software to blend these multiple exposures together and achieve an image that is much closer to what you could see with your own eyes.
I teach bracketing and blending along many other useful photography techniques as part of my Online Training via Patreon, I recommend learning this technique before you visit Karijini!
- Another challenge you will come across is glare and reflections having an unwanted effect on your images. The solution for this is to use a CPL filter on your lens. I'll go into this in more depth in the equipment recommendations below!
- The last main challenge that landscape photographers may face at Karijini National Park is trying to capture an image without people in the frame. The best way to get around this issue is to visit the gorges early in the morning before the crowds arrive. If you're too late and you ask politely enough, most people will be happy to move aside for you to get your shot. If you end up having people in your frame don't worry too much! It's not the end of the world and Photoshop is a powerful tool for removing people from your photography. I teach Object Removal as part of my Online Training via Patreon too.
What camera equipment do I need to photograph Karijini National Park?
If you are visiting Karijini for landscape photography, this is the camera gear you'll need to get great results.
- A polarising (CPL) filter. Glare is one of the big challenges to overcome when shooting from the bottom of the gorges in Karijini. This is because a lot of the rock is so smooth and polished that it reflects a lot of light, all of the freshwater pools and waterfalls will also have a lot of reflections so a polarising filter is highly recommended. I have written an article on filters for landscape photography too. I am an authorised reseller for NiSi Filters and you can contact me for advice on which filters to purchase to suit your gear at a great price.
- Neutral Density (ND) Filters. These come in varying strengths and are frequently used by landscape photographers to achieve a slow shutter speed for that smooth water look. I recommend filters within the 3-6 stop range, and have gone into more depth on my filters for landscape photography guide. I am an authorised reseller for NiSi Filters and you can contact me for advice on which filters to purchase to suit your gear at a great price.
- A GOOD tripod. Tripods are often an afterthought for many new landscape photographers, but a good, sturdy, tripod is essential for taking great landscape images, and you will enjoy the process much more with an easy to use tripod. I recommend using a ball head along with a tripod that has a fully adjustable leg angle. I go into much more depth on selecting the right tripod on my Tripod Selection For Landscape Photography guide. I am also an authorised reseller for Sirui & Explorer tripods, you can contact me for advice on your next tripod purchase to suit your needs at a great price.
- A lens cleaning kit. You should carry lens cleaning equipment with you in your camera bag at all times. An ideal kit will contain at least one microfibre cloth, lens cleaning solution, a rocket blower, and a soft bristle brush.
- Dry Bag(s). A lot of the hiking trails in Karijini follow waterways where it is very slippery, and some even require you to swim or wade through water. It can be quite precarious even without camera equipment, but it would be devastating to destroy a camera in such a place so I highly recommend keeping your gear safe in a dry bag whilst hiking.
As for the camera, I am assuming readers already have their camera of choice so I won't make any recommendations here. But for lens choices, If I could only take one lens to Karijini it would be my 14-24mm f/2.8. My second choice would be a 24-70mm lens. The compositions and photographic opportunities that these camera lenses will provide in the gorges are endless. A telephoto lens is also great for isolating a subject and capturing some unique images in Karijini.
Some other considerations for your visit to Karijini.
Phone reception is scarce within the Park. If your provider is Optus you will get signal at both of the campsites but nowhere else. Telstra mobile users will be able to get reception at the Mount Bruce Carpark and on the hike there, thanks to the close proximity to the Marandoo Mine Site.
Even though the days are often warm, it can become very cold overnight in the Pilbara, on occasion temperatures could even drop close to 0° Celsius. Don't forget to bring some warm clothing and sleeping gear for night time.
The trails in WA National Parks are graded based off of difficulty from Class 1 - 6, 1 being the easiest and most accessible, and 6 being the most difficult. See Walking Grade Classifications for more detail.
The gorges and hikes of Karijini National Park
Dales Gorge
Dales Gorge is the most accessible gorge in Karijini, with a sealed road leading all of the way into the campground and day use areas. It is also unique in comparison to the other gorges as it is a little bit wider and much more vegetated. The walk through the lush ferns and paperbarks is a delight for the senses. Fern Pool and Fortescue Falls are both located in close proximity within Dales Gorge. You can also hike down the length of the gorge toward Circular Pool (which has been closed for the past few years due to rockfall danger).
The hike into Dales Gorge is a steep but easy Class 3 trail. It is 800m from the car park to Fortescue Falls, and another 300m from Fortescue to Fern Pool.
There are a lot of interesting scenes to photograph in Dales Gorge, but the main features are Fern Pool, Fortescue Falls, the lookout at the top of the gorge, and the cascades just below Fortescue Falls.
The best light to photograph Dales Gorge occurs at sunrise. But the window of nice light is short, so you may need to visit on two mornings to photograph both Fortescue Falls and Fern Pool. I recommend hiking down on first light and getting to the bottom of the gorge before sunrise. If you can only manage one visit to Dales Gorge, you should photograph Fortescue Falls first before heading to Fern Pool as the light becomes harsh here quickly.


Kalamina Gorge
Kalamina Gorge is a beautiful spot, but the road in is rough and I am yet to capture an image that I feel is worthy of sharing from here. For that reason I would prioritise it last after the other gorges in Karijini.
The trail along Kalamina is one of the more gentle walks in the park, and there is a nice waterfall that flows after a good wet season to your right as you reach the bottom of the gorge. A large paperbark tree has fallen in front of the waterfall, obscuring the view and making it difficult for photography.
Knox Gorge
Knox is one of the lesser visited and underrated gorges in Karijini. There is a stunning viewpoint from the top of the gorge, and inside there is an area similar to the scenery you will see in Dales, but then further along it narrows down and changes completely. I do think Knox is worth photographing on your visit to Karijini but the best shots seem to be from the lookout rather than in the gorge, so if you are short on time you can save yourself the effort of hiking down.
The hike down into Knox Gorge is probably the most challenging of all trails in Karijini. It is a steep Class 5 descent into the gorge, but once you're in the walk gets much easier. It is 2.7km return to the end of the trail and back. Make sure you pay attention to the signage and don't wander into prohibited areas.
Once in the gorge, if you walk to the right you will soon arrive at a large blue pool surrounded by ferns and lush vegetation. If you turn left you'll follow the trail past a lovely rock pool as it begins to narrow.
Both morning and afternoon are a great time to visit Knox Gorge for photography, and due to the gorge being vey deep and mostly North-South facing, much of it is in the shade for a few hours after sunrise/before sunset allowing plenty of time to explore and photograph. My recommendation of when to visit Know Gorge for photographers will vary depending on the weather forecast.
- If there is cloud on the forecast: I recommend starting at the lookout for sunrise (as you may get some spectacular colour in the sky) and then making your way down into the gorge afterwards.
- If the forecast is for clear skies: Then I would recommend visiting in the afternoon instead. I would start in the gorge and work my way out for sunset at the viewpoint, and shoot facing away from the sunset.


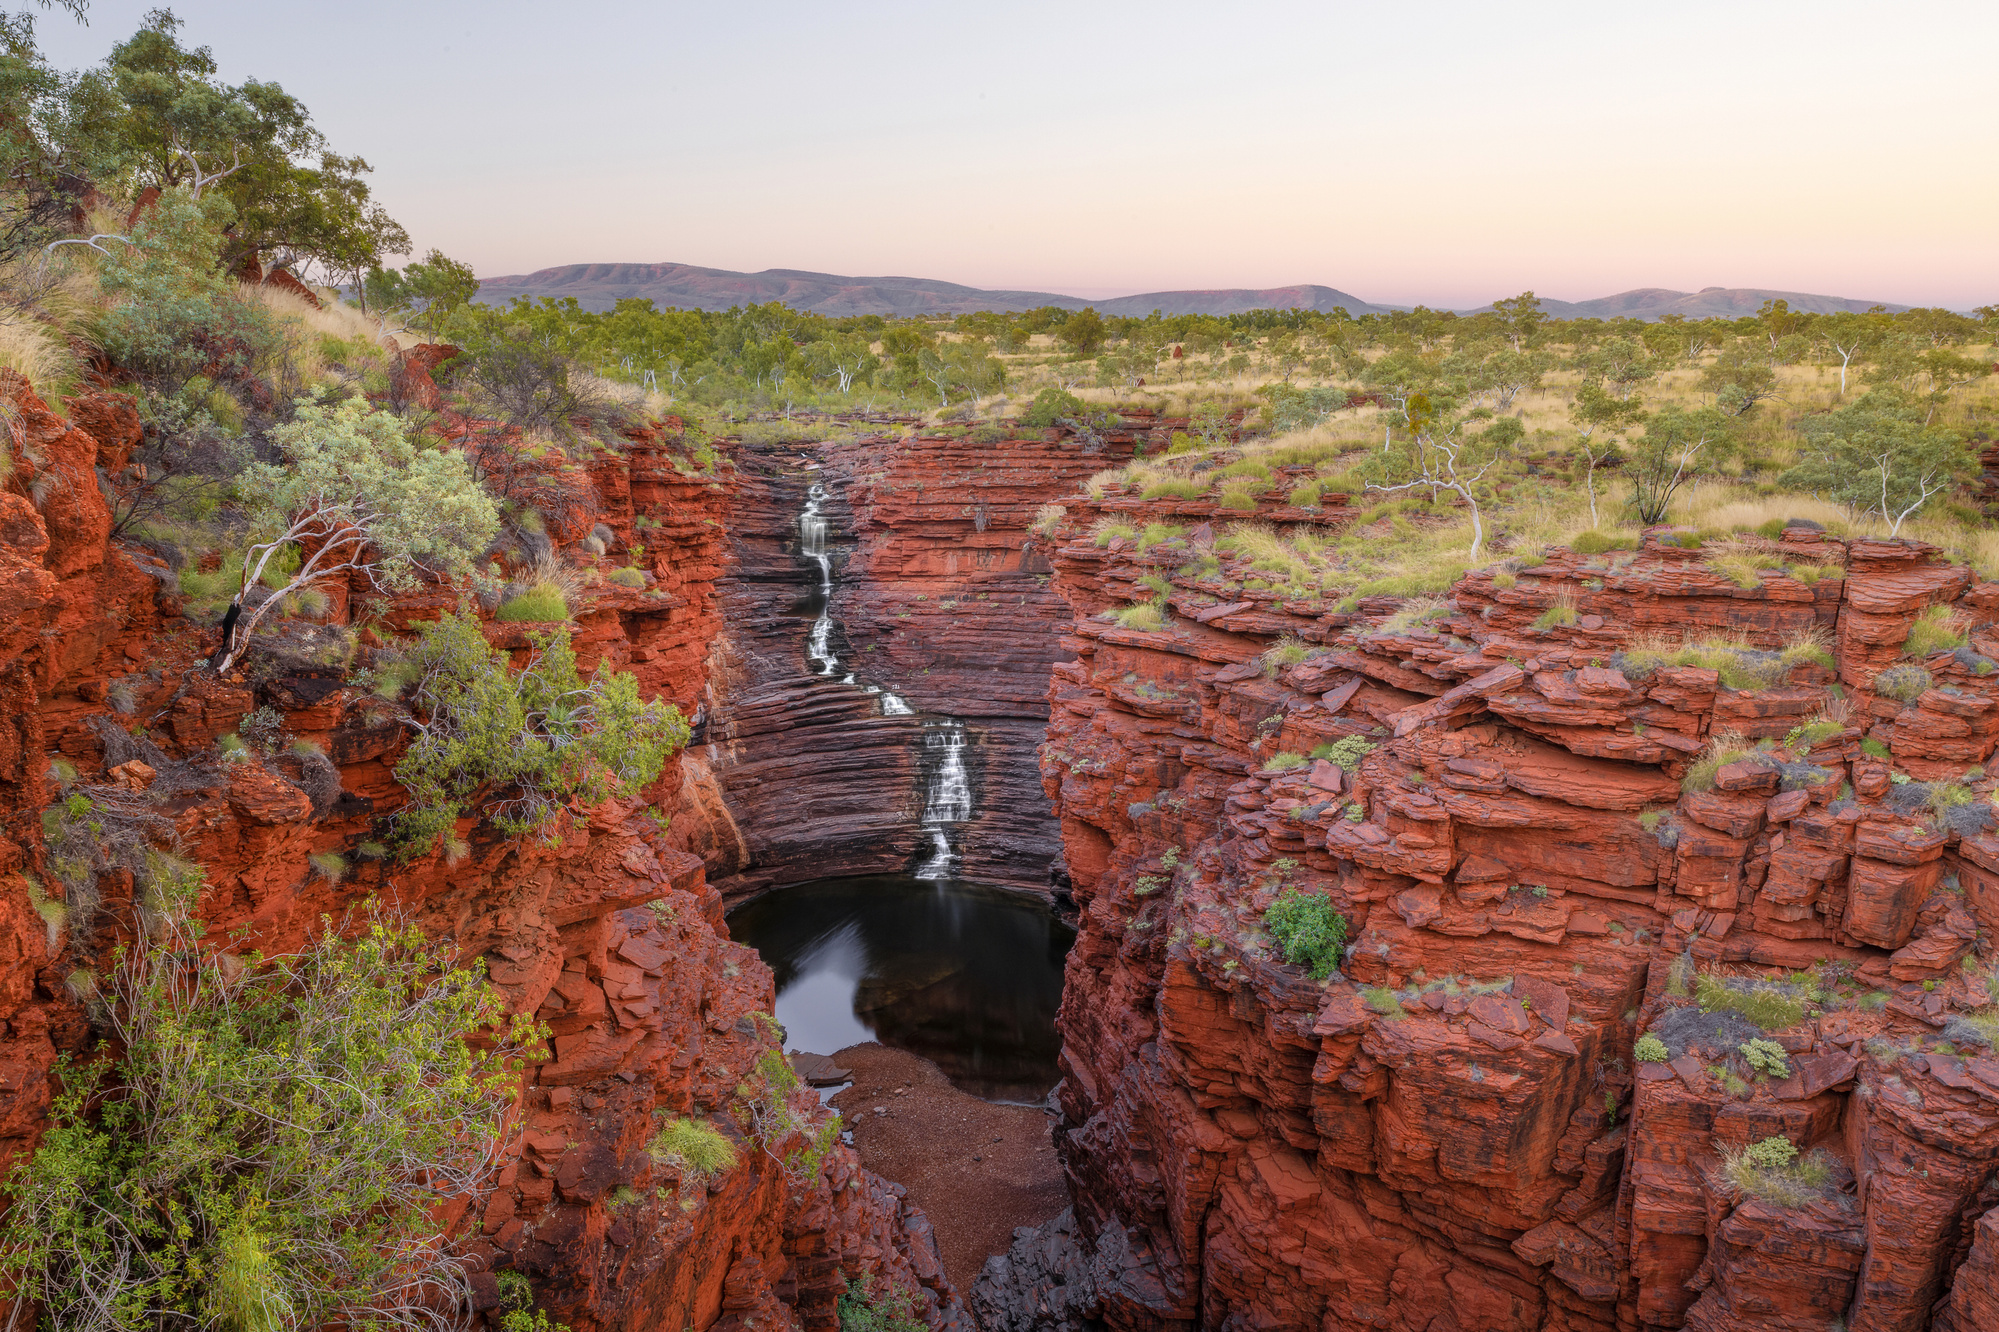
Joffre Gorge
Joffre Gorge is situated right next to the Karijini Eco Retreat, making it a great option for a late afternoon or early morning shoot if you are camping at the retreat. This gorge is home to the largest and most impressive waterfall in the entire park, if it is flowing that is. I first began visiting Karijini back in 2016, and on the first visit Joffre Falls was flowing quite well, however on multiple later visits the waterfall was dried up, and it wasn't until 2021 that I was finally able to photograph the waterfall. It does seem to rely on some wet season rain to keep it flowing throughout the tourist season, this is why I recommend going early in the dry.
The hike to the Joffre Gorge Lookout is relatively flat and easy from the car park. Getting into the gorge itself starts off as a class 4, and then quickly turns into a near vertical Class 5 descent down some rocky ledges. It used to be one of the more difficult gorges to access but some ladders have now been installed which may make it much easier for hikers to get to the bottom. If the waterfall is flowing, you'll usually need to be prepared through water (knee - waist deep) to reach it. There is also a nice little cascade downstream from where you enter the gorge which makes for a good shot, but it is very slippery here so take care and don't get too close to the edge.
Photographers should visit the Gorge Lookout for the best lighting at sunrise. If you are quick you may have opportunity to hike into the gorge and photograph the waterfall from below before the light is too harsh, but it is likely you'll need to visit twice to do a good job of photographing all of this gorges main features. I recommend coming back in the afternoon, and waiting until the gorge is in the shade again to photograph the falls and lower cascade.


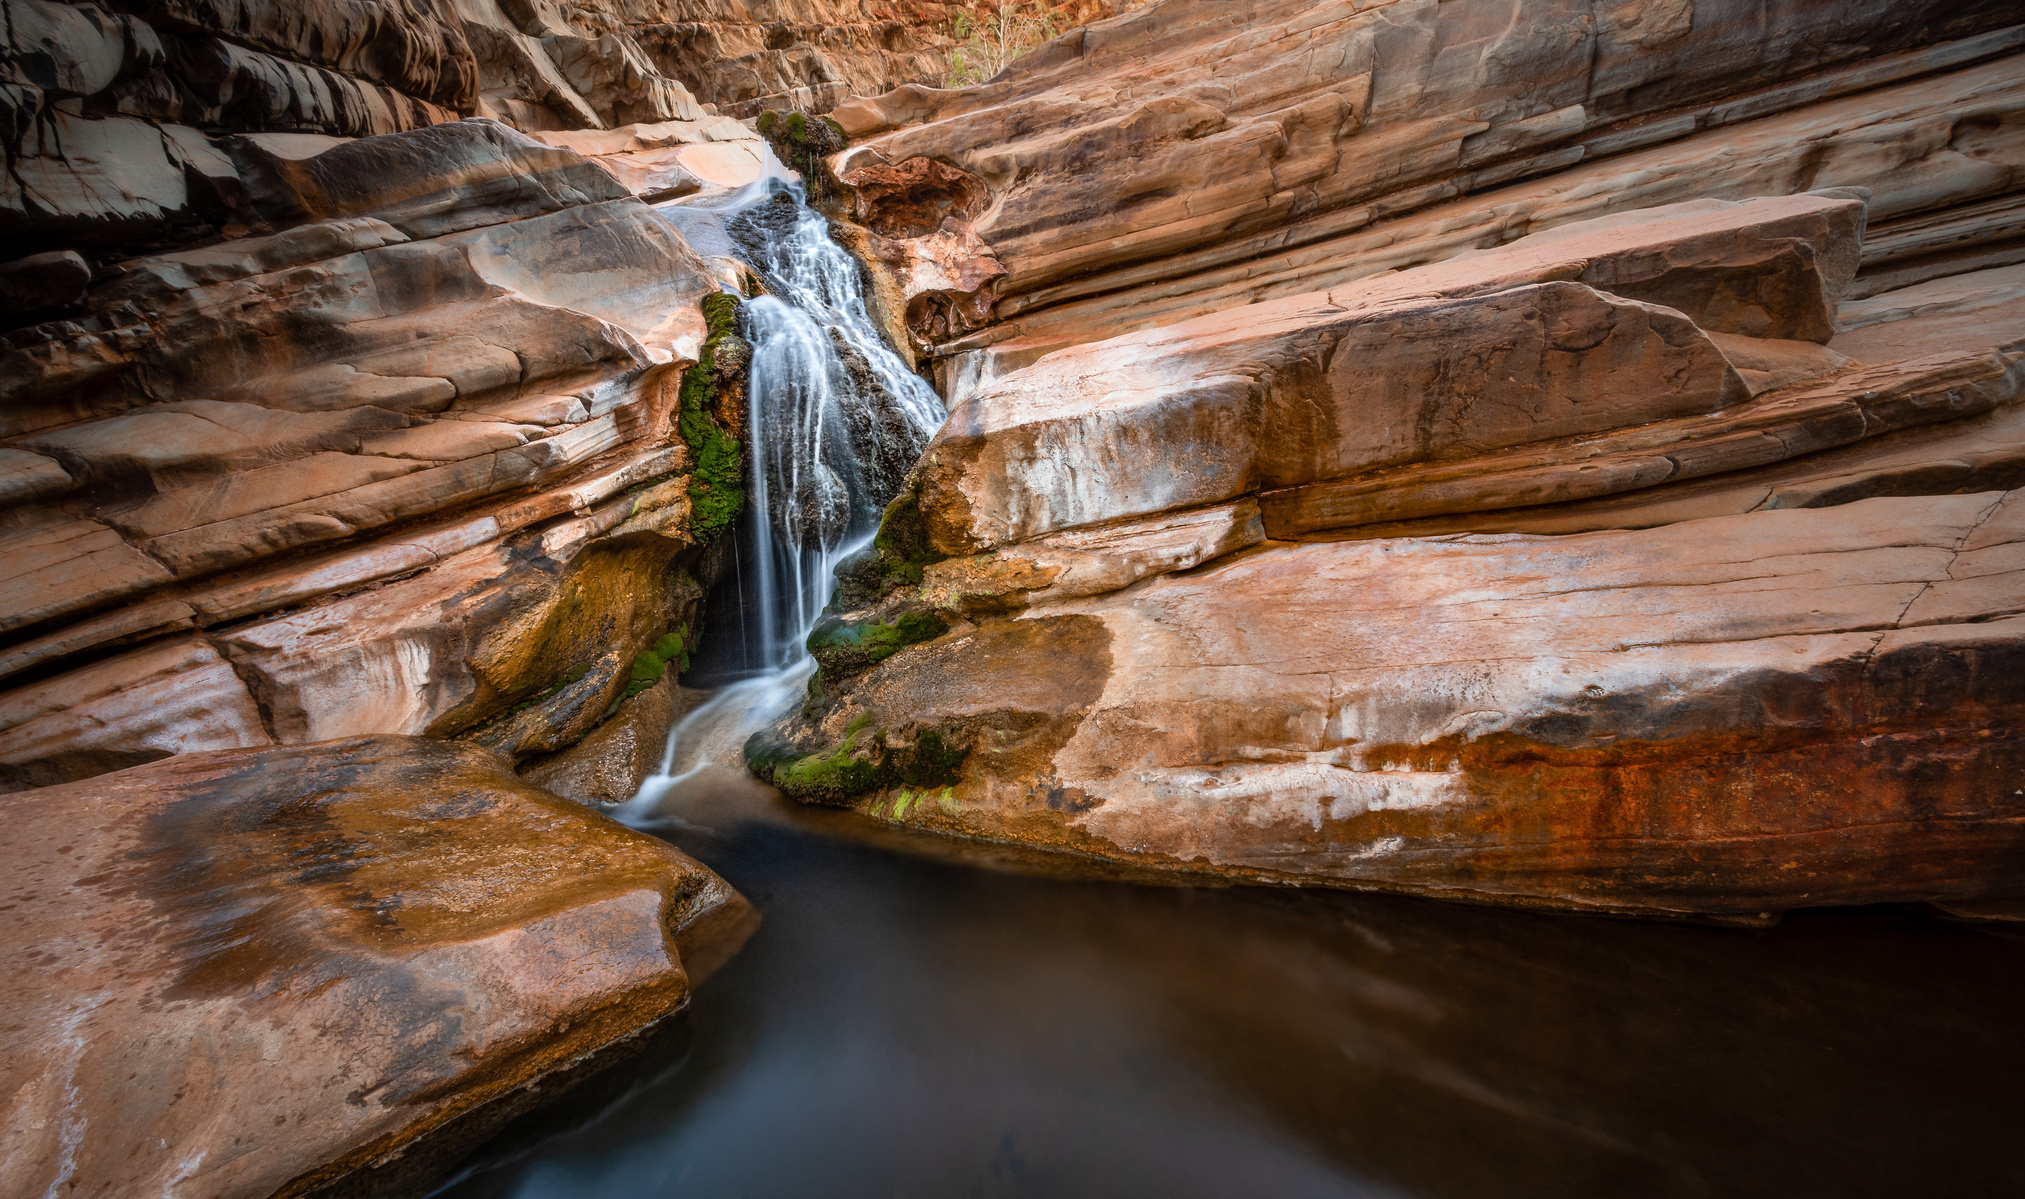
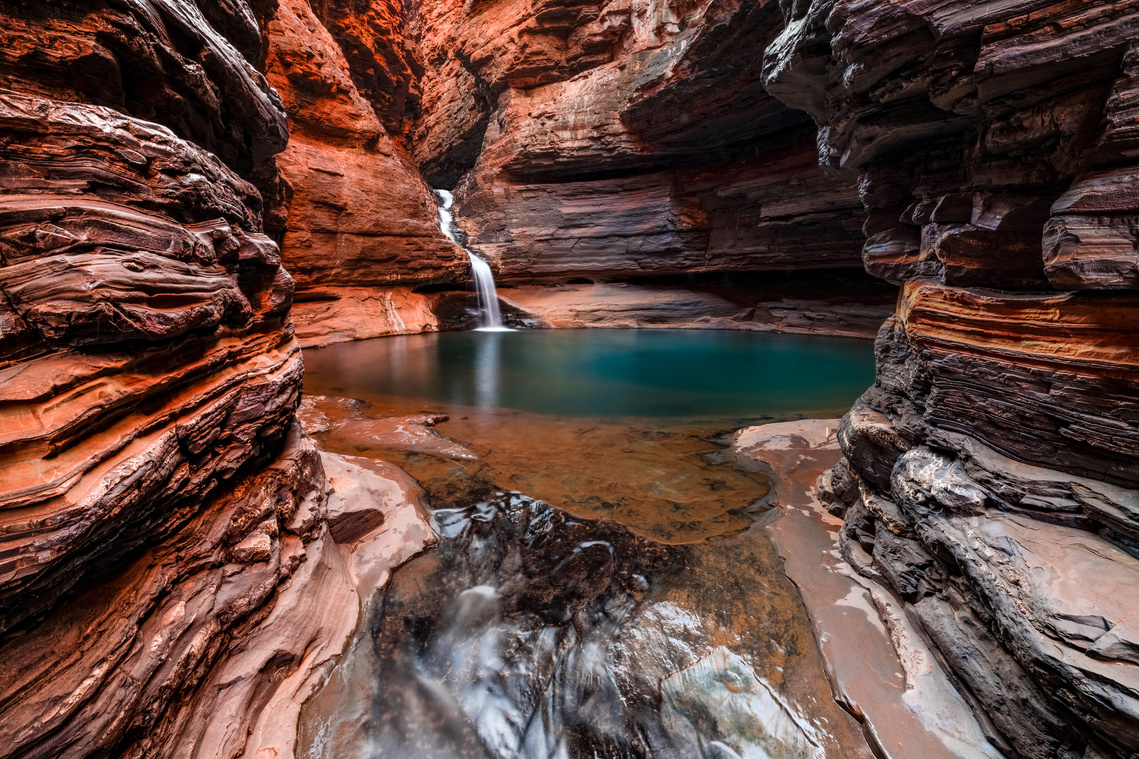
Hancock Gorge
If I had to pick a favourite gorge, Hancock would be the one for me. There is so much photographic potential in such a short stretch of the gorge, the compositions are seemingly endless. It is a deep narrow gorge that at times feels like you are are on a journey to the centre of the Earth. There are multiple cascades and rock pools along the way before you arrive at Kermits Pool, the main attraction of the gorge.
The hike to Kermits Pool and back is 1.5km, but it is a class 5 trail. You'll of with a steep descent followed by climbing down two ladders and then making your way down the gorge along the edge of a freshwater stream. There is a section where you'll need to wade through water, and then if you are agile enough you shuffle across a narrow ledge alongside a rockpool. If you have any doubts of your ability to get along the ledge, you can swim this section instead. I definitely recommend keeping your camera equipment in a dry bag for this hike. After the swim you still need to navigate the Spider Walk. The trick here is to stay low and walk through the water, and before you know it you'll be at Kermits Pool!
I recommend photographers arrive at Hancock Gorge at first light and begin making their way down once visibility is enough to comfortably see where you are going. There is a good chance you will have the gorge to yourself for a few hours, and if anybody else is in here this early it will likely be other photographers.
The Amphitheatre has a nice little waterfall to photograph, and the Spider Walk offers some interesting angles from both sides. Not long after the sun rises, beautiful golden light bounces off of the gorge walls which can be seen in the reflections of Kermits Pool, and from the top of Regans Pool.


Weano Gorge
Weano Gorge is accessed from the same carpark as Hancock, if you are fit and agile enough it is possible to visit and photograph both gorges in a single morning, but I personally would prioritise Hancock Gorge and come back for Weano if needed. The trail here is a class 4 for the most part. But once you arrive above handrail pool it turns to a class 5 and becomes noticeably more difficult. There have been multiple accidents and injuries from people attempting to access Handrail Pool over the past few years, and to stop this from happening DBCA rangers have recently installed new infrastructure to prevent further injuries. Unfortunately the new platform is a bit of an eyesore for photographs, but it is in the best interest of visitor safety.
I recommend visiting Weano in the early morning for best light and to beat the crowds. There is a great composition that I found back in 2018, just beyond Handrail Pool at a section of the gorge that locals call Tunnel Creek.


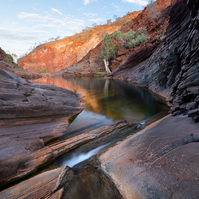
Hamersley Gorge
Hamersley Gorge is another gorge that is unique to the rest of those in Karijini. It is much more open, and the sun shines onto the pools for a big part of the day making it a great gorge for a swim. Spa Pool, Karijini's most famous waterhole is located in Hamersley Gorge. This pool has been photographed by many landscape photographers across the world and is one of those iconic shots. It's the waterfall that brings most people to Karijini in the first place.
This gorge is on the far Western end of the park, closest to Tom Price, and you do need to drive a long way on a gravel road to get here but it is SO worth it. Majority of the road is usually in very good condition because it is a mine site access route and they are constantly maintaining it. Be careful of oncoming traffic in the dust when driving into Hamersley Gorge.
The Hike from the carpark to the base of the gorge is a short and sweet class 4. Once you are in the gorge, turn right and follow the trail markers along up toward the first waterfall. From here you can continue up the ladder and swim across the next pool to reach Spa Pool (with your gear in a dry bag of course!). I highly recommend swimming across to Spa Pool because the edge of the water is very jagged and slippery. You'll also need to be very careful unpacking your camera gear and setting up because it is extremely slippery and there aren't many safe places to stand or set up.
I recommend visiting for either sunrise, or sunset. The light is usually better for sunset, but it is much more likely that other people will be enjoying the gorge at this time which might spoil your photographs. If you visit for sunrise there is a pretty good chance you'll get the gorge to yourself.


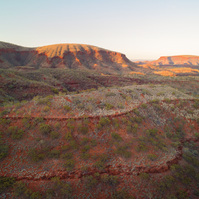


Mount Bruce
There is more to Karijini than gorges! Mount Bruce is a perfect example of that. For the adventurous, there is the option to summit the mountain via a 9km trail. I'm sure the view is great up there but I haven't had the opportunity to climb it just yet, it is high on my list of things to do!
I have however, photographed Mt Bruce from the roadside on the way into the carpark on multiple occasions. I find the best time to shoot here is in the late afternoon leading up until sunset, and my favourite compositions are usually found around the halfway mark from Karijini Drive to the carpark.


Other Gorges
There are also a few other gorges within Karijini National Park that are off limits to the general public. It is possible but unlikely to get ranger permission to visit some of these if you are well prepared for overnight hiking, but after some research and visiting a few of them I can see the gorges open to the public are the most scenic anyway. The Gorges include: Yampire Gorge, Snell Gorge, Red Gorge, Wittenoom Gorge, Bee Gorge, Munjina Gorge, and Dignum Gorge.
Wittenoom Gorge can be accessed through the old townsite to the North of Karijini, but it is not recommended because there is A LOT of asbestos present and in my opinion it is not worth it (I have been here any probably wouldn't go back again).
Munjina Gorge East can be seen outside of Karijini from the Albert Tognolini Rest Area on the Great Northern Highway (Near Auski Roadhouse)
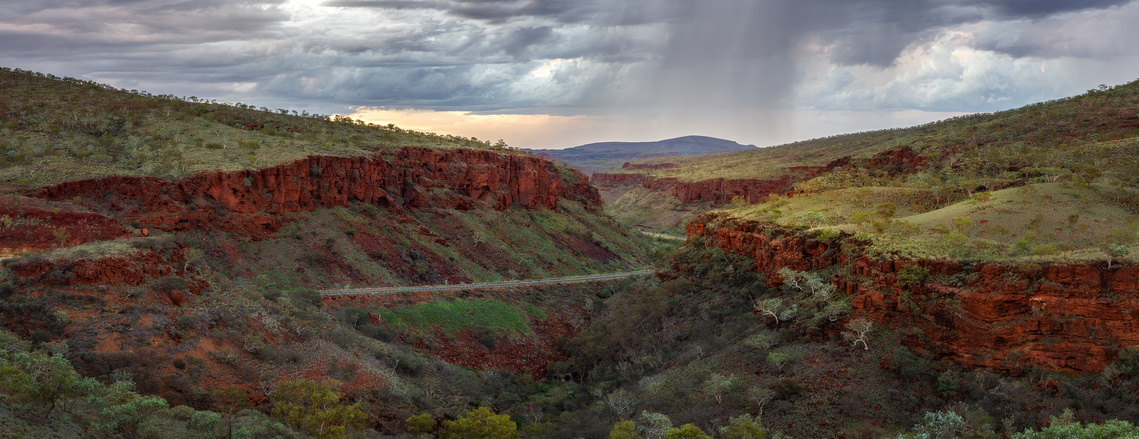
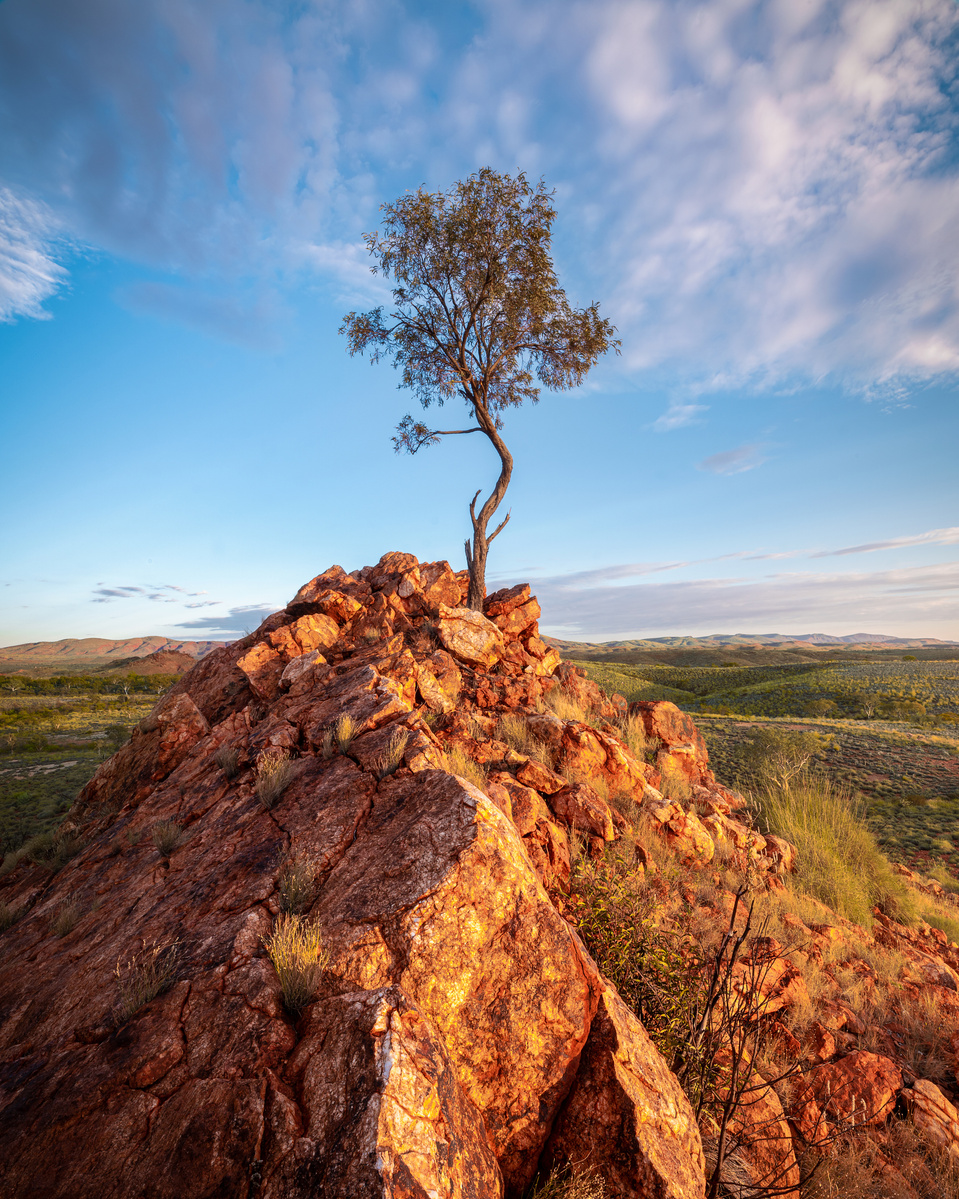
Beyond Karijini
Whilst Karijini National Park does get the spotlight, there is stunning scenery worth photographing all over the Pilbara. If you are visiting it is worthwhile allowing a few extra days either side of your trip to explore outside of the park too. I'll leave some of my images below for inspiration and example of what else is out there!


4 Day Itinerary Suggestion for Photographers Visiting Karijini National Park
Karijini is one of those places that you could never tire of photographing and there is definitely more to see if you stay longer than 4 days, but this is a reasonable amount of time to allow to visit the gorges and have a well rounded portfolio of images.
Day 1 - Recommended stay at Dales Campground the night before.
- Sunrise at Dales Gorge, photographing Fortescue Falls and Fern Pool.
- Sunset at the Knox Gorge viewpoint (arrive a few hours early if you want to explore and photograph from inside the gorge too).
Day 2 - Recommended stay at Karijini Eco Retreat the night before.
- Sunrise at the Joffre Gorge Lookout.
- Sunset/Afternoon shoot in Joffre Gorge, photographing Joffre Falls and the lower cascade.
Day 3 - Recommended stay at Karijini Eco Retreat the night before.
- Hancock Gorge at first light, photographing Kermits pool, the Spider Walk, and the Amphitheatre. Followed by Weano Gorge if you have the time and energy.
- Sunset shoot at Mount Bruce (I recommend pulling over approximately halfway down the access road and shooting from the roadside)
Day 4 - Recommended stay in Tom Price the night before.
- Sunrise shoot at Hamersley Gorge, photographing Spa Pool and the other pools/cascades.
- Afternoon shoot at whichever gorge you missed or feel you needed more time at.
Thanks for reading!
I hope you have enjoyed reading this Photographers Guide to Karijini National Park! Do you want to join us in 2023 for an epic 6 day Karijini Photography Adventure? Travel, meals, and accommodation will be provided throughout duration of the workshop and the workshop price will be approximately $5850pp with a maximum of 5 participants.
The tour itinerary will have a heavy focus on photography and we will be visiting the most stunning destinations at the best times of day to photograph them.
Contact me to Express your interest.
All of the images here are available as prints, if the photograph you'd like isn't in the online store, just contact me.
Want to know my process of taking and editing these photographs? Subscribe to my Patreon page for online learning, or consider joining me on a Photography Workshop.