
How to photograph LIGHTNING! A Landscape Photographer's guide.
Included in this guide:
- My 3 on location techniques to capture lightning with your camera (based on different scenarios & available equipment)
- Settings for photographing lightning
- Equipment required (includes some optional accessories)
- A list of free mobile applications and websites that assist with planning and live storm tracking
- A post processing video covering subject specific editing techniques and general processing
Lightning is one of the most difficult things to capture in landscape photography for a few reasons, but the main issue I find around my home in the Southwest of WA is the inconsistency of thunderstorms, which means we don't get many opportunities to get out and practise!
You will need to be persistent, or just get lucky to capture some bolts is some areas of the world, whereas others might have more opportunity.
A few other problems you'll need to overcome are:
- Finding a safe place to photograph the storm. Staying safe is the #1 priority when out shooting storms. Pay attention to your surroundings, and make sure you have multiple exit routes if the storm gets too close. Lightning can often be accompanied by heavy rain and strong winds which can make driving very dangerous, I recommend keeping your distance from the storm so you can stay safe.
- Getting an unobstructed view of the storm for your photographs. You might notice that a lot of the time many weather photographs don't have much going on in terms of composition and using other elements of the landscape in the photograph. Most of the time this is because it is very difficult to predict where the storm will end up in advance, even when you are in the right place it is very tricky to capture a lightning strike in your composition where you would like it.
I have missed out photographing many lightning bolts because I've found a nice composition on location and then sat there waiting for the strike right where I want it, whilst it is all happening just outside of my frame.
My advice is to adapt to each situation as it presents itself, work on just capturing a few bolts before focusing too much on composition. A lot of the time tilting the camera up toward the sky and only having a small amount of foreground is fine because the cloud structure is often interesting enough for a photograph anyway!
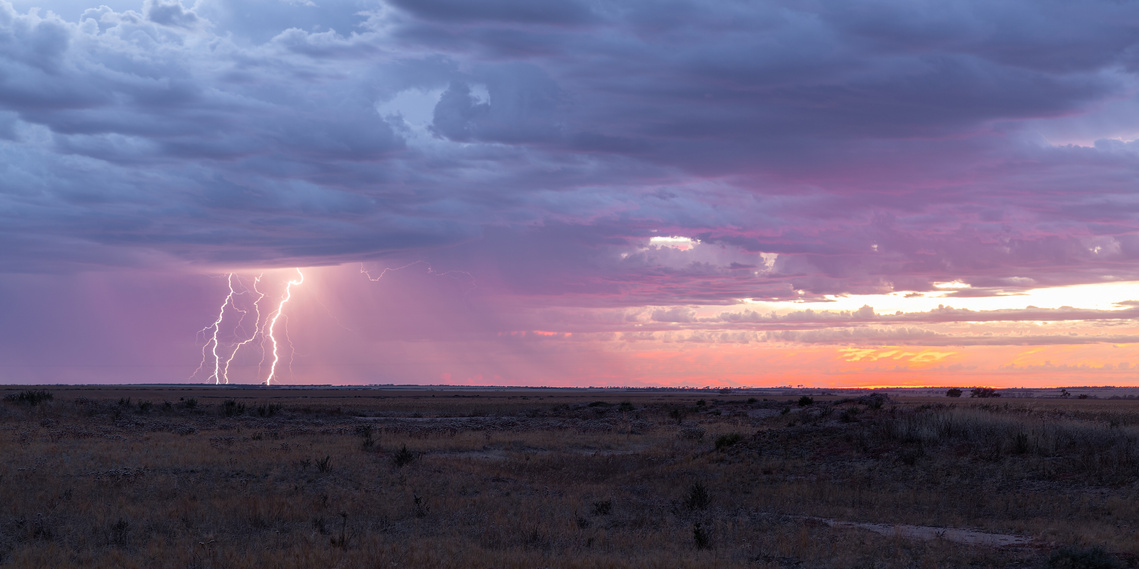
- Over/underexposing lightning. The more you go out, the better you will get at deciding which settings will be needed to correctly expose a strike, but the intensity can vary so much between one bolt to the next that it is unlikely you will expose every one correctly! Recently I have been out photographing lightning which was mostly distant and cloud based, my camera was set up to expose these strikes well, and all of a sudden a large cloud to ground strike happened close by which completely over exposed my frame to the point where it was irrecoverable.
Below: An overexposed strike, the bright area in the sky has no detail to recover in post processing even though it is shot in RAW format.
F/7.1 ISO 640 2sec.

Settings & equipment for lighting photography:
For the first two techniques, I ALWAYS have the camera set to Aperture Priority Mode, not manual! The light surrounding thunderstorms is so dynamic and can change drastically in a matter of settings. The third technique I explain uses bulb mode (for this I set my Nikon to Manual, and dial the shutter one click past 30 seconds to reach BULB, this varies between brands and camera models).
With Aperture Priority Mode, you will select your desired aperture and ISO, then the camera will decide on the correct shutter speed to achieve the desired exposure as set with your exposure compensation. I recommend familiarising yourself on how to dial in the exposure compensation to make your images brighter or darker before heading out to capture lightning.
Your aperture and ISO settings will effect how bright a lightning strike appears in your image, but the shutter speed will not. This is why I choose to let the camera decide the shutter and remove the need to be constantly checking the images as light changes.
Another thing that I believe is a MUST when shooting lightning is to TURN OFF long exposure noise reduction. Otherwise all the good bolts will happen whilst your camera is processing the previous image instead of taking another.
Aperture: A wide (e.g. f/2.8) aperture will result in brighter lightning strikes as well as a more shallow depth of field. A narrow (e.g. f/16) aperture will make lightning strikes less intense and increase depth of field.
I recommend starting at your ideal aperture for the scene you are photographing (lots of foreground? Use a narrow aperture to make sure the entire image is in focus. Not much foreground, just aiming toward the sky? You should be okay with a wide aperture.)
Wait for a few bolts and review your images. If the lightning is too bright, close the aperture down (higher f/number) if it is dull, open up the aperture (lower f/number). I generally start between the range of f/6.3 & f/11 then adjust as needed.
ISO: Your ISO is probably going to be the most frequently varying setting when photographing lightning. You'll have an ideal aperture that you want to stick to if possible, but the ISO can float up and down without being as essential. Sure, if you bring the ISO up too high you will introduce a bit of grain to the images, but cameras handle that pretty well these days, and there is software such as Topaz Denoise that works a treat to help with grainy images.
I generally start with my ISO at around 250-400 if the lightning is distant or embedded in cloud, but if it is much closer/brighter, I'll leave my ISO at 64-100 then adjust as needed. I'll usually adjust my ISO before changing the aperture, but it really is a balancing act between the two.
Equipment: Obviously you'll need your camera, lens, memory cards (with plenty of space available!!) CHARGED BATTERIES (speaking from experience), and a GOOD TRIPOD that doesn't rattle around in the wind. I can get you discounts on Sirui & Explorer brand tripods if you need an upgrade!
A mid-range zoom is ideal most of the time. Something like a 24-70mm or 24-105mm lens will help you include some foreground in the shot whilst having the lightning (if it isn't more than 20km away) fill a reasonable amount of the frame.
Ultra wide angle lenses can create some pretty epic shots of lightning and thunderstorms, but if you're filling the frame with lightning at 15mm, your life is probably in danger, so I don't recommend that.
Lightning trigger/ or shutter release cable: The triggers are not just a gimmick! These things seriously work, and they will give you much more consistent results. I use the Miops Smart+ which was reasonably priced considering that I can switch between lightning mode, interval shooting, bulb mode, and other shooting modes all by using the app so I don't have to be right next to the camera.
If you don't want to go all out and get a lightning trigger just yet, a simple shutter release cable is great (see techniques 1 & 3) for capturing lightning, especially if it has a function to lock the cable release on!
Special Offer From MIOPS
Readers save 15% on all orders from MIOPS when using the code NATUREBYNATHAN on checkout.
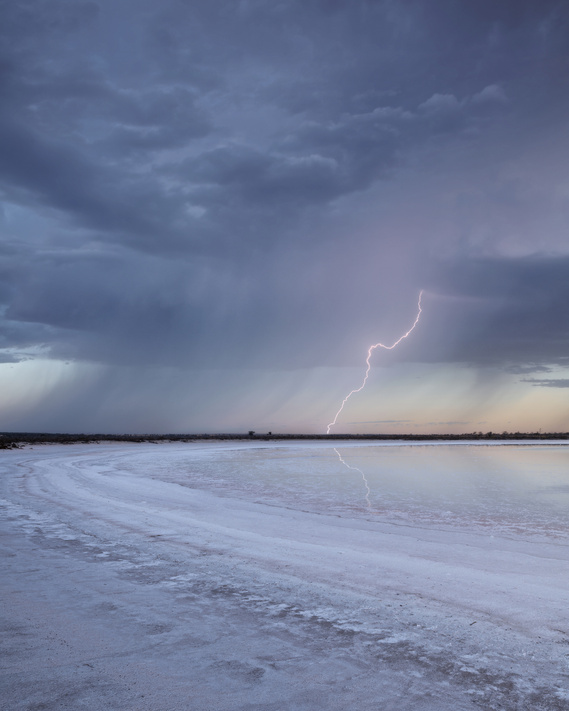
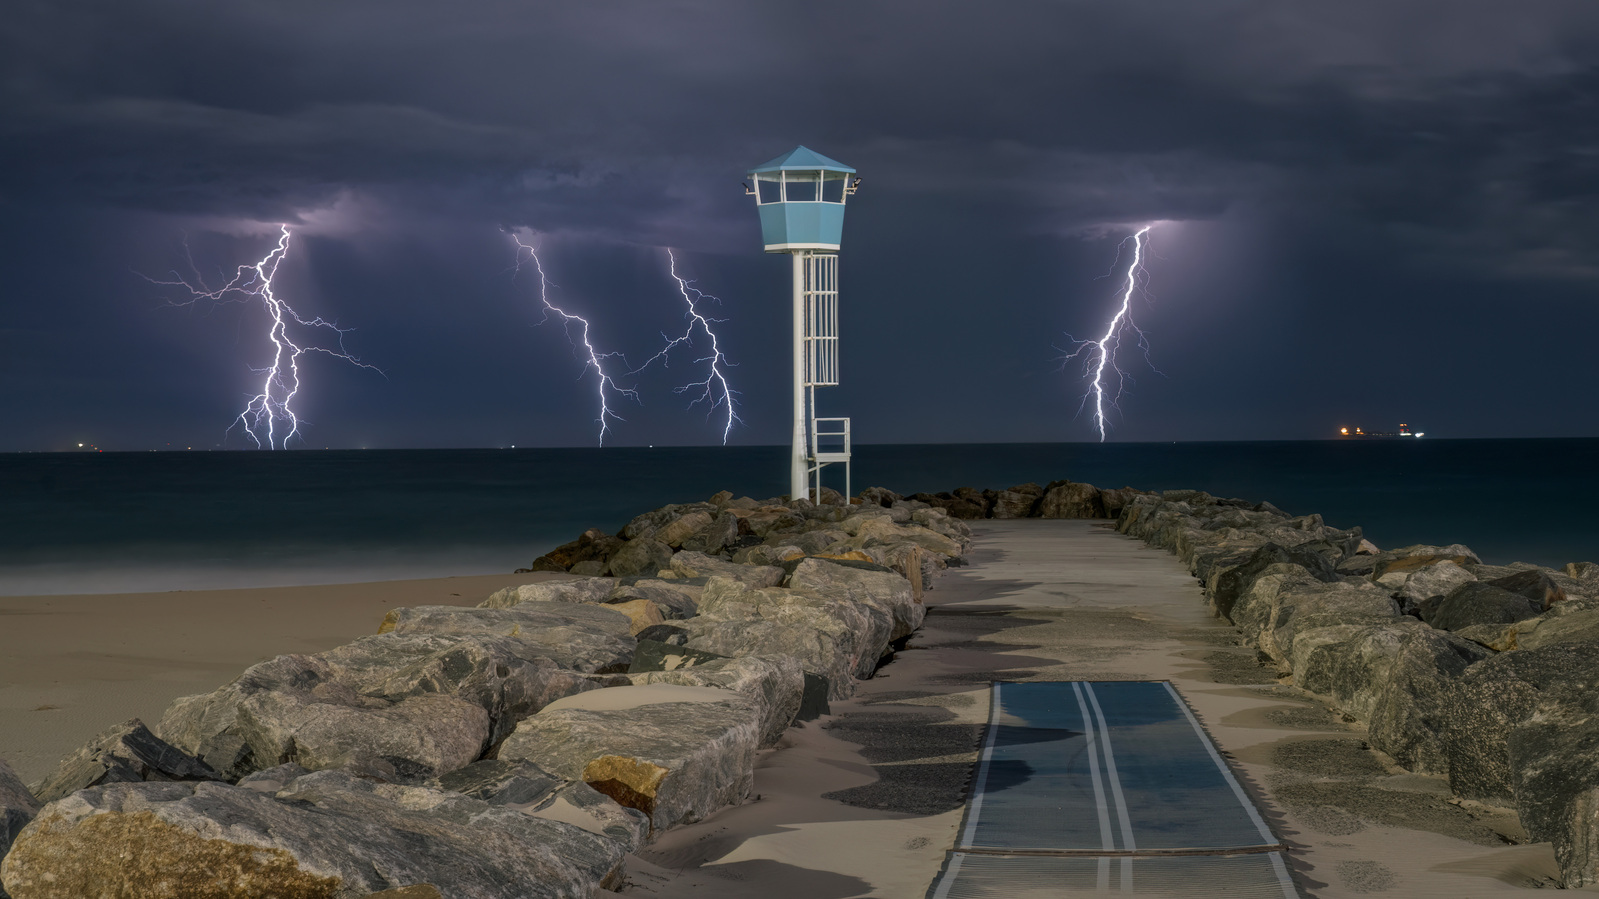
Below: Here there weren't many options for foreground interest, so I aimed the camera to the sky to include more of the details in the cloud and less of the messy foreground. Lightning is the obvious subject in the image. f/5.6, ISO200, 17.5sec.

My 3 techniques to capture lightning in different scenarios.
1 - Continuous shooting.
This is the way to go if you are trying to capture lightning without a trigger, and you are shooting in daylight hours.
There are two ways to set the camera up for continuous shooting and try to capture lightning.
- Method 1 requires a shutter release cable of some sort. First set your camera up and point it in the direction you think lightning is going to occur. Set your focus, put the camera in aperture priority etc, then set the cameras drive mode to Continuous High or whatever your brand calls it (Nikon is Continuous High/ Ch). Make sure autofocus is switched off after you set everything up (or it will hunt between photos and some might end up out of focus) and lock the shutter cable on then cross your fingers and toes that you capture some lightning!
- Method 2 does not require a shutter cable unless your camera does not have an inbuilt interval timer. I know some of the lower end Canon Mirrorless don't include this feature for some reason (probably just to make you upgrade/spend more money). If you Don't have the inbuilt interval mode just use method 1.
If you do have an inbuilt interval timer, but no shutter release cable or lightning trigger, do this. Set up the camera as normal (frame the shot, set your aperture, ISO, focus point, etc) and then go into your interval timer menu (location varies between camera models/brands).
Have a look at the shutter speed your camera is giving you on aperture priority mode and make note of it. Also have a think about the conditions e.g. is it late afternoon likely to get darker? Early morning going to get brighter? Midday and light should stay about the same? Use a bit of forethought with this assumption plus your current shutter speed, and set the interval time (frequency in which your camera sends itself a signal to take a photo) based off of this.
For example if I am shooting throughout sunset I know the ambient light is only going to get darker. Aperture priority mode is currently giving me a 1.5sec shutter speed, but as it gets darker that will continue to slow down... 2 seconds, 4 seconds, 8 seconds, etc. I'll set the interval to take a photo every 3 seconds for now, and keep an eye on my camera while it runs. As it gets darker and my shutter speed gets closer to my interval time of 3 seconds, I will slow down the interval even more to 5 seconds etc.
The reason for this is because if your shutter is open for longer than the interval for each photo to be taken, your camera will not keep taking photos consecutively (mine won't anyway.
Also set up the interval to take a heap of shots (I'll usually just set it so 1000 or so, because I don't want it to stop until I'm ready for it to.)
Only use this method if you can't use method 1, because it is a lot more difficult and less consistent!
With the continuous shooting technique, you will likely end up coming home with hundreds (at least) if not thousands of images to go through and hope that you successfully captured a few lightning strikes. Only use this technique if A) you don't own and aren't willing to buy a lightning trigger and B) It is still daytime.
2 - Use a Lightning Trigger.
This is the best technique to use when photographing storms in daylight hours. Just set your camera up as normal, taking into account the settings info from above and then set the device up to trigger the shutter when it detects a sudden change in light (The Miops Smart+ which I use has sensitivity controls etc).
It really is that easy. I recommend turning off live view and also reviewing the images intermittently to make sure exposure is correct. You can keep using this technique into the night but I prefer to switch the camera to manual mode and use technique 3 which is...
3 - Bulb Mode.
If you are unfamiliar with bulb mode, it basically will keep the shutter open for as long as you hold the button down, and then will close on release. If you are in a dark area (e.g. the wheatbelt of WA or anywhere away from city lights) then you will be able to keep the shutter open for an extended time (e.g. 2 minutes) whilst waiting for a lightning strike to occur in your frame, and then simply release the shutter when finished.
This is best done with a shutter release cable or if your camera has a app to control via Wifi that works too! I still use my Miops Smart+ for it these days because it is ease to switch that between lightning mode and shutter lock on/off for bulb mode.
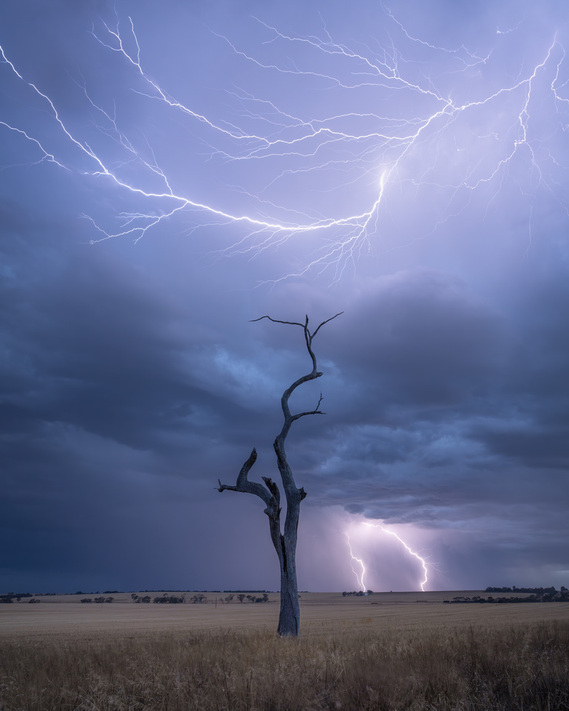
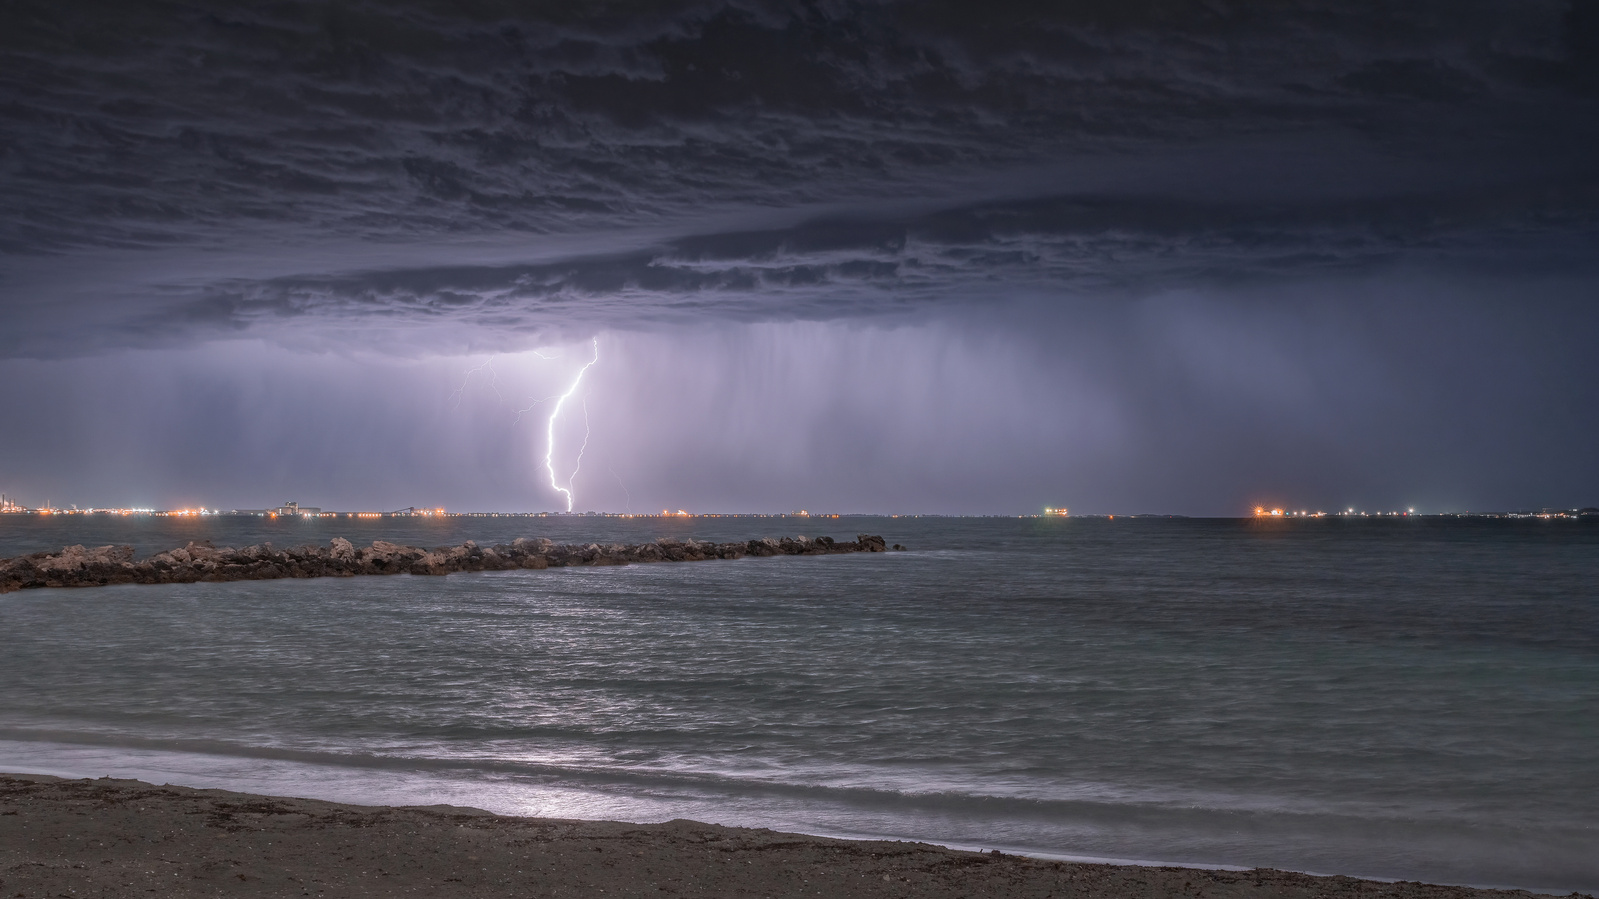
Below: An overhead crawler, this was a bit too close for comfort but one of my favourite compositions I've managed to capture with lightning. There was actually a lot in the distance when I was setting up but then another cell came over from behind me right on sunset.
Apps / Websites to help with planning & tracking.
Deciding where and when to go can be made easier using the following mobile applications and websites.
Planning in advance:
- Windy.com APP (Go to Rain, thunder/ thunderstorms and then scroll through the days to see if there are any potential thunderstorms in the next 10 days.
- BOM weather forecast for specific areas (e.g. Brookton or York weather forecast) to see if thunderstorms are forecast.
Real time tracking:
- Australia weather radar with lightning tracking: https://farmonlineweather.com.au/radar/was
- My lightning tracker APP
Post Processing
Want to know how I edit my lightning photography? My post processing video is available for download for a once off fee of $5.49.
In the video I use Photoshop and Topaz Denoise to create an image out of three photographs taken in a thunderstorm.
Watch to the 2 minute mark for the lightning and foreground blending in photoshop. This is an easy subject specific technique (I only use it for my lightning images). From the 2 minutes onward I demonstrate how I edit my storm photography using Camera Raw/Lightroom.


Thanks for reading!
For more photography tips & tricks, check out my Blog.